Installing and Preparing Stellar Repair for Exchange
Microsoft Exchange is at the core of enterprise communication and collaboration. When mailboxes or databases become inaccessible due to corruption, accidental deletion, or server crashes, IT administrators need a reliable solution to recover data quickly — that’s where Stellar Repair for Exchange excels.
Stellar Repair for Exchange is an advanced tool purpose-built to recover mailbox data from damaged or corrupt EDB (Exchange Database) files, without requiring transaction logs or backups. It’s widely adopted by Exchange administrators, disaster recovery specialists, and IT service providers for its speed, accuracy, and ability to work around native tool limitations.
Importance of Mailbox and Database Recovery in Exchange
Exchange hosts critical emails, calendars, contacts, and attachments. Any disruption — from accidental deletion to database corruption — can impact business continuity and compliance. Native tools like ESEUTIL and New-MailboxRestoreRequest have limitations, especially when logs are missing or mailbox data is purged.
Fast, reliable recovery ensures:
- Minimal downtime
- Prevention of data loss
- Faster return to operational state
- Adherence to regulatory or audit requirements
How Stellar Repair for Exchange Helps Admins
- Recovers mailboxes from corrupt or dirty shutdown databases
- Bypasses log dependency and replay mechanisms
- Restores deleted items — including emails and mailboxes
- Supports export to PST, Office 365, and live Exchange
- Enables granular recovery with powerful filtering options
- Works across versions from Exchange 5.5 to Exchange 2019
Best Practices for Safe Installation & Use
Stellar Repair for Exchange should be installed on a dedicated client or recovery system, separate from the live Exchange Server.
-
- Dismount the database before recovery
- Clone the EDB file (never work on originals)
- A Windows 11 or Server-based VM with admin rights
- Offline access to the EDB file (cloned or copied)
- Outlook installed (non-store version, part of Office suite)
- Disable antivirus temporarily during scan on cient system
- Use Extensive Scan for deep recovery
- Ensure Outlook is installed correctly (not via Microsoft Store)
Why Not Install It on the Exchange Server?
Installing or running recovery tools directly on the Exchange Server can:
- Interfere with live mailbox operations
- Risk further corruption or downtime
- Overuse system resources during scan and export
- Conflict with Exchange services or antivirus software
Risks of Using It on a Live EDB File
Accessing a mounted EDB introduces serious risks:
- File locking may restrict accurate scanning
- Uncommitted transactions may cause inconsistencies
- Exported data may be incomplete or contain anomalies
“Always work on a cloned copy of a dismounted database”
Importance of Cloning the EDB File
Working on a cloned copy preserves:
- Integrity of the original database
- Reusability for testing or auditing
- Safety against accidental data overwrite
How to Clone the EDB File:
- Dismount the Exchange database:
Dismount-Database "DB01" - Copy the EDB file to another location:
Copy-Item "C:\Program Files\Microsoft\Exchange Server\V15\Mailbox\DB01\DB01.edb" "D:\Recovery\DB01-Test.edb" - Work on the cloned
.edbusing Stellar
Dependencies & Limitations on Outlook
To export mailboxes to PST, Stellar requires:
- Full version of Outlook installed via Microsoft 365 or Office Suite
- Outlook must support MAPI integration
- Store-installed versions are not compatible
Using in a Non-DAG (Single Server) Environment
If you’re not running Database Availability Group (DAG):
- Dismount the database manually using PowerShell:
Dismount-Database "DB01" - Clone the EDB file to your recovery system
- Run Stellar Repair to extract and export data without affecting other users
System Reaquirements for Installation:
| Component | Minimum Requirement |
|---|---|
| OS | Windows 11 / 10 / Server 2016+ |
| RAM | 4 GB (8 GB recommended) |
| Storage | 250 MB for install + recovery space |
| Outlook | Full version (Office suite only) |
| Exchange Compatibility | Exchange 5.5 to 2019 |
Installation Steps
1. Download the Installer
- Visit the official Stellar Repair for Exchange page
- Click Free Download to get the
.exeinstaller - Save it to a local drive on your recovery system (not the Exchange server)

2. Launch the Installer
- Double-click the downloaded
.exefile - If prompted by Windows, click Yes to allow changes
- Select the Installation Language

3. Setup Wizard
- The Stellar Setup Wizard will open
- Click Next to begin

4. Accept License Agreement
- Read the End User License Agreement (EULA)
- Click I Accept to proceed

5. Choose Installation Path
- Select the folder where you want to install the software
- Default path is usually:
C:\Program Files\Stellar Repair for Exchange

- Select Next at the Start Menu program’s shortcut window

- Click Next in the Addiotional Tasks window to keep the desktop shortcut

6. Start Installation
- Click Install to begin the process
- Wait for the progress bar to complete

7. Finish Setup
- Once installed, Leave the check mark for “Launch Stellar Repair for Exchange” option.
- click Finish to lanuch Stellar

Post-Installation Checklist
- Ensure Outlook (full version) is installed for PST export
- Confirm .NET Framework is up to date
- Disable antivirus temporarily during recovery scans
- Prepare a cloned EDB file for safe recovery
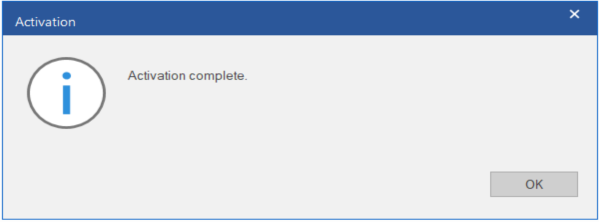
Product Activation
- Once you have the Stellar Repair for Exchange open, Click on the Activation Tab
- On the Activation window, enter the product key received as part of your purchase
- Click Activate

Conclusion: Preparing for Recovery Starts Here
Successful Exchange recovery begins with proper setup — installing Stellar Repair in a controlled, isolated environment dramatically reduces risk and improves effectiveness. By avoiding live database scans, provisioning proper Outlook support, and working with cloned files, IT admins can run clean recoveries with confidence.
In the next part of this series, we’ll walk through real recovery workflows — from restoring deleted emails and mailboxes to repairing damaged databases.